-
Background
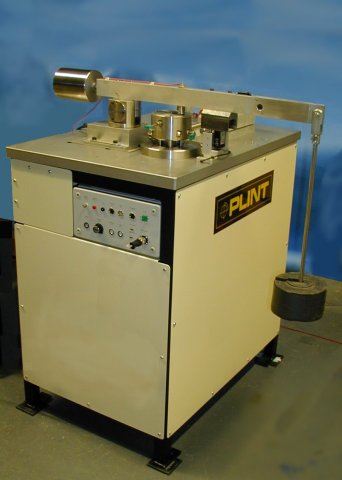
The TE 99 was formerly known as the Eyre/BICERI Universal Wear Machine and has a worldwide user base. The original machine design was made by Dr. Terry Eyre of Brunel University and Neale Consulting Engineers and it was subsequently marketed and manufactured by BICERI Limited.
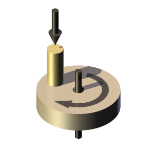
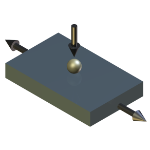
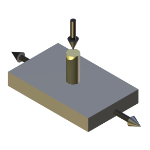
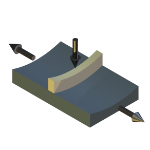
The Universal Wear Machine is suited to the wear testing of materials in pin on disc or pin on plate modes. The TE 99 has a Class 1 contact configuration (pin or ball loaded vertically downwards onto a horizontally rotating disc) and may perform tests according to the guidelines laid out in ASTM G 99, DIN 50 324 and ISO/DIS 7148-2. In reciprocating mode the machine can perform tests according to ASTM F 732.
The operating ranges can be extended with options for a heated lubricant enclosure, a reciprocating plate adapter and fixtures for piston-ring/cylinder liner specimens in reciprocating mode.Description
The machine base frame holds the disc carrier spindle and the load/friction measurement system assembly in a fixed, accurately aligned, orientation.
The test pin is fixed in a sliding carriage clamped to the load beam. Nominally flat on flat contact is possible with a level load beam, but in practice this is difficult to achieve. Balls and pins with a radius, conical or triangular tip are recommended as these self-align when they wear.
The load beam is counter-balanced and pivots at one end on suspended roller bearings. At the other end of the beam, large weights are supported on a weight carrier that overhangs the base plate and small weights rest on the beam located by a steel peg. The wide load range achievable allows parametric studies to be made based on load. It should be noted that there can be considerable inertial effects at higher loads caused by weight bounce and this can influence the wear rates and/or mechanisms. This problem can be more acute with high hardness test materials.
The load beam pivot is trunnion mounted. When the beam is horizontal, it is restrained from transverse movement by a strain gauge force transducer. A retaining clamp maintains the beam in contact with the transducer at all times, ensuring that bi-directional forces generated in pin on disc and reciprocating contacts are measured.
The transducer output connects to a strain gauge amplifier and the output from this is passed through a true rms/dc converter and then connected to the interface to give averaged friction readings in both uni-directional and reciprocating pin on plate modes.Disc Carrier
The test disc is mounted on the disc carrier spindle and secured by a central bolt. The spindle is driven through a pulley belt by the vector controlled a.c. motor mounted beneath the machine. The motor has encoder feedback to ensure stable running speeds.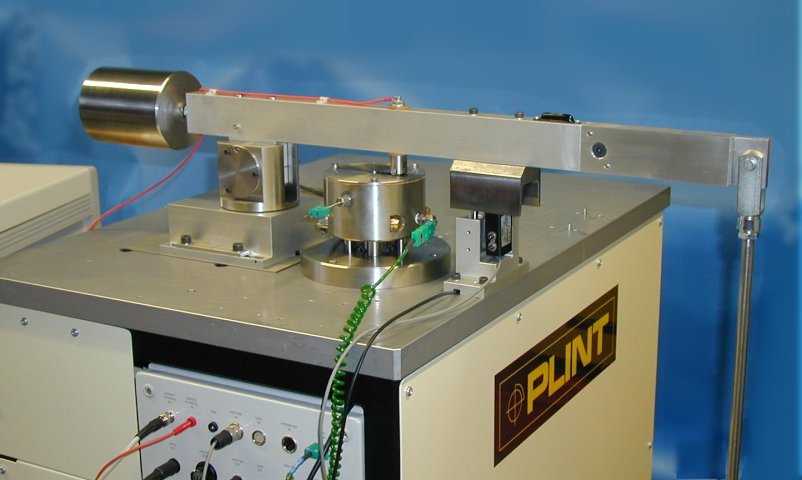
The track radius is set by moving the pin carriage along the beam and locking in place. This permits multiple tests to be performed on one disc specimen with a spacing of 2 mm between tracks. An integral scale on the beam is used to determine the radius set.Wear Measurement
An indication of wear processes going on in the contact is given by a linear potentiometer mounted on the pin carriage. This transducer measures the vertical movement of the pin relative to a fixed datum during a test (this can be due to wear, thermal expansion and wear debris generation).
Contact Potential Measurement
The pin carriage is electrically isolated from the load beam and therefore from the disc specimen. This allows a small potential to be applied across the contact from a Lunn-Furey Contact Resistance Circuit. The connection to the disc spindle is via a slip-ring.
Variations in the voltage across the contact are indicative of the amount of contact between the pin and disc specimens provided that both are conductors of electricity. Maximum voltage (typically 40 mV) corresponds to no contact (open circuit) while zero voltage corresponds to full contact (closed circuit). The voltage signal will typically fluctuate rapidly during a test so an rms signal is used for recording purposes.
This kind of measurement is extremely useful when working with lubricants containing additives, solid lubricants and surface coatings. The contact measurement can be used to assess the formation and breakdown of high resistance chemically bonded films on the metal surfaces and the failure of coatings/films in the contact.Calibration
The most important parameters to calibrate on the TE 99 are the friction force and wear. Included with the machine are a pulley, cord and weights to apply a tangential force to the load beam for friction calibration and a slip gauge for wear calibration.
Control and Data Acquisition
Control and data acquisition are implemented via host PC running COMPEND 2020 Windows compatible software, in conjunction with a Phoenix Tribology USB micro-controller interface.
Automatic control is implemented via user programmable test sequences. Manual control is implemented using on screen toggles. Data is stored to hard disc in either .csv or .tsv file formats.TE 99/R Reciprocating Pin on Plate Adapter
The Reciprocating Pin on Plate Adapter mounts on the machine base plate to the right of the drive spindle. The trunnion mounted load beam/friction sensing system is also moved to the right so that the test pin is located at the centre of the plate stroke.
The fixed plate specimen is located on two screw fittings in a stainless steel reservoir. The reservoir is clamped to a block that is heated by electrical resistance elements and the temperature is monitored by a thermocouple pressed against the side of the specimen or holder. The reservoir can be moved sideways on the heater block so that multiple tests can be performed on one plate specimen.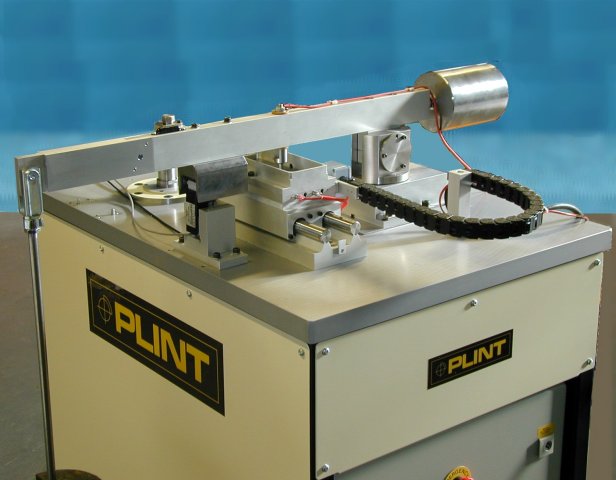
The heater block is mounted on a small base plate, restrained to move in a horizontal plane by linear bearings. This plate is reciprocated by means of a simple crank connected to the drive spindle. The crank pin position may be adjusted to provide a range of strokes.
The reciprocating adapter offers a valuable extension to the operating range of the TE 99. In particular the reciprocating contact offers a more realistic simulation of some practical contact situations (for instance reciprocating seals, piston ring and cylinder liner and other repeating contacts). The maximum operational frequency at 110 mm stroke is limited to 1 Hz for reasons of machine vibration. Higher frequencies are permissible provided that the total stroke is reduced (e.g. 5 Hz at 50 mm stroke).
The primary role of the pin on disc machine is as a tool for the analysis of the wear of materials. The reciprocating pin on plate adapter is likewise a tool for the analysis of wear. One of the chief differences is in the dynamics of wear particles. In the pin on disc, the particles are free to move away from the contact area, whereas in the reciprocating contact there is a much higher chance of the particles being involved in the contact and to contribute to the friction characteristics.
The reciprocating adapter is also more suitable to the study of abrasion than the pin on disc mode, again because of the way in which the abrasive particles will be involved in the contact region. The linear motion makes this mode suitable for studying different surface finishing techniques.TE 99/LE Lubricant Enclosure
The TE 99/LE is a stainless steel enclosure that mounts over the drive spindle. It is sealed against the rotating shaft and provided with a lid to permit tests to be run with the disc fully immersed in fluid. Electrical resistance heater elements are mounted in the base of the enclosure to allow the fluid temperature to be controlled up to 200°C. Thermocouples are provided to monitor the enclosure and fluid temperatures.
The fluid may be fed by gravity or circulated through the enclosure using the TE 99/LS or other suitable circulation system. The feed position is on the lid close to the in-running side of the contact and the drain is located at the base of the enclosure.TE 99/LS Lubricant Recirculating System
The Lubricant Recirculating System uses an anodised aluminium bath and lid with inlet, outlet and thermocouple ports. The bath is mounted on a laboratory heater/stirrer unit. A magnetic paddle is placed inside the bath to ensure that the liquid is heated evenly. The temperature of the liquid is monitored by the thermocouple mounted in the lid and the value is read off from a free-standing temperature display unit. The temperature set-point is selected manually on the heater unit.
There are two integrated peristaltic pumps, one to pump liquid from the bath to a test adapter and one to scavenge the fluid from the test adapter and return it back to the bath. The scavenge pump does not have to be used if the fluid is of low viscosity (eg water) when a gravity return is sufficient.
TE 99/HT Heating & Temperature Sensing Package
The TE 99/HT comprises a stainless steel enclosure, a method of heating and a temperature sensor. The enclosure surrounds the disc specimen and has an inlet and outlet port and a lid with access for the pin specimen and a viewing port.
The air heating system consists of a high power air blower with electrical resistance heating element. The hot jet is directed into the inlet port of the enclosure and the exhaust is directed to a chimney covering the outlet port.
The temperature of the disc specimen is measured using an optical pyrometer. The pyrometer is a non-contacting device with a focal distance of 76 mm (distance between the lens and the disc edge) with a k-type thermocouple output. The pyrometer is used to monitor and control the temperature in the enclosure.TE 99/LCA Line Contact Adapter
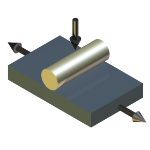
Sample holders for running tests with piston ring and cylinder liner on the TE 99/R Reciprocating Adapter. This incorporates a self-alignment mechanism to ensure face contact is maintained.
-
Technical Specifications
Rotational Speed: 20 to 2,000 rpm Equivalent Sliding Speed: 0.05 m/s to 8 m/s Radius of Test Track: 0 to 38 mm Dead Weight Loading Range: 5 to 2,000 N Friction Force: 0 to 50 N and 0 to 1,000 N Wear Measurement: Linear Potentiometer 0 to 2.5 mm Resolution better than 2 µm Contact Potential: 40 mV dc signal Temperature Sensing: k-type thermocouples Disc Specimen: 75 mm diameter x 8 mm thick Pin Specimen: 8 mm diameter Ball Specimen: 6 mm diameter Motor: 2.3 kW ac vector Interface: Phoenix Tribology USB micro-controller interface Software: COMPEND 2020 TE 99/R Reciprocating Plate Adapter Stroke: 0 to 110 mm (continuous variation) Frequency: 0.5 to 15 Hz 1 Hz max. at 110 mm stroke 5 Hz max. at 50 mm stroke 15 Hz max. at 2 mm stroke Heating Power: 800 W Temperature: ambient to 400°C Plate Dimensions: 120 mm x 40 mm x 3 mm thick TE 99/HT Heating & Temperature Sensing Package Temperature Range: up to 400°C Air Heating Power: 2.8 kW Temperature sensing: Optical Pyrometer TE 99/LE Lubricant Enclosure Bath Volume: 150 ml Heating Power: 400 W Temperature Range: ambient to 200°C TE 99/LS Lubricant Recirculating System Bath Volume: 1.2 litres Peristaltic Pump Flow: 1 litre/minute (maximum) Heating Power: 550 W Temperature Range: ambient to 100°C Automatically Controlled Parameters Rotational Speed Temperature Test Duration Manually Controlled Parameters Load Measured Parameters Rotational Speed Wear Friction Force Temperatures Contact Potential Number of Revolutions Test Duration Sliding Speed Friction Coefficient Sliding Distance Services Electricity: 220/240V, single phase, 50 Hz, 7.5 kW 110/120 V, single phase, 60 Hz, 7.5 kW Installation Floor-standing: 900 mm wide x 600 mm deep x 1,200 mm high, 250 kg Control cabinet: 530 mm x 800 mm x 300 mm high, 20 kg -
Applications
Publications
Paper # 161 Metallographic Aspects of Wear Eyre T S, Wilson F, Metals and Materials, 3(3), 1969, 86-91. Paper # 162 The Dry Sliding Wear Characteristics of Copper With and Without 0.08 Silver Eyre T S, Wibberley R, Wear 13, 1969, 27-38. Paper # 163 Wear Characteristics of Flake and Nodular Graphite Cast Iron Eyre T S, Iles R P, Glasson D W, Wear 13, 1969, 229-245. Paper # 164 Effect of Matrix Structure and Hardness on the Wear Characteristics of an S.G. Cast Iron Eyre T S, Wear l4, 1969, 107-117. Paper # 165 The Relationship Between Load and Sliding Distance in the Initiation of Mild Wear in Steels Farrell R M, Eyre T S, Wear 15 (5), 1970, 359-372 Paper # 166 Surface Aspects of Unlubricated Metal to Metal Wear Eyre T S, Maynard D, Wear 18, 1971, 301-310. Paper # 167 Development of Materials for Automobile Crankshafts Eyre T S, Lea M, Engineering Materials and Design, 15, 1972, 327-333. Paper # 168 Running-in Characteristics of Graphitic Cast Iron Eyre T S, Maynard D, Institution of Mechanical Engineers, l9th Conference of Tribology Group, Paper C101/72 (1972). Paper # 170 The Formation of White Layers at Rubbing Surfaces Eyre T S, Baxter A, Metals and Materials, 6, 1972, 435-439. Paper # 171 Effect of Phosphorus on the Friction and Wear Characteristics of Grey Cast Iron Eyre T S, Williams P, Wear 24, 1973, 337-349. Paper # 172 Friction and Wear of Some Engineering Materials Against Chromium Plating Gologan V, Eyre T S, Wear 28, 1974, 49-57. Paper # 173 Assessing the Durability of Electro-deposited Metal Films Briscoe B, Eyre T S,, Gologan V, Wear 28, 1974, 271-275. Paper # 174 Use of the Scanning Electron Microscope in Wear Studies Eyre T S, Dutta K K, ASLE/ASME Conference 1974, ASLE Paper 74-LC1B-1. Paper # 175 Some Metallurgical Aspects of Scuffing Eyre T S, Dutta K K, Proc. I. Mech. E. International Conference on Scuffing, 1975, Paper C74/75. Paper # 176 Effect of Boronising on Friction and Wear of Ferrous Metals Eyre T S, Wear 34(3), 1975, 383-397. Paper # 177 Wear of Sintered Metals Eyre T S, Walker R K, Powder Metallurgy, 1(1), 1976, 22-30. Paper # 178 Wear Characteristics of Metals Eyre T S, Tribology International, 9(5), 1976, 203-212. Paper # 179 The Effect of Phosphating on the Friction and Wear Properties of Grey Cast Iron Perry J, Eyre T S, Wear 43, 1977, 185-197. Paper # 180 Effect of Boronising on Adhesive Wear of Titanium Alloys Eyre T S, Alsalim H, Tribology International, 10(5), 1977, 281-285. Paper # 181 Wear of Aluminium Silicon Alloys Shivanath R, Sengupta P K, Eyre T S, The British Foundryman, 70(12), 1977, 349-356. Paper # 182 The Mechanisms of Wear Eyre T S, Tribology International, April 1978, 91-96.???? Paper # 183 The Use of a Replica Technique to Study Wear Eyre T S, Tribology International, 11(4), 1978, 241-242. Paper # 184 Cylinder Liner Wear in Low Speed Diesel Engines Nadel J, Eyre T S, Tribology International, 11(5), 1978, 267-271. Paper # 185 A Practical Interpretation of Unlubricated Wear Data for Some Non-Ferrous Metals Stott G, Eyre T S, Wear 50, 1978, 285-297. Paper # 186 The Metallurgy and Wear Characteristics of Boride Coatings Eyre T S, Morri J, Heat Treatment of Metals, 4(5), 1978, 103-105. Paper # 187 Wear Resistance of Metals Eyre T S, Treatise on Materials Science and Technology, Volume 13 “Wear”, Scott D. ed., Academic Press Inc., 1979. Paper # 188 Tribological Characteristics of Diffusion Coatings Eyre T S, The Institution of Metallurgists, Surface Treatments for Protection, Spring Review Course, Series 3, No. 10, April 1978. Paper # 189 The Effect of Surface Topography on the Wear of Steel Shafia R A, Eyre T S, Wear 61(1), 1980, 87-100. Paper # 190 Wear of Aluminium Alloys Eyre T S, Microstructural Science Vol. 8, Proceedings of the 12th Annual Technical Meeting of the International Metallographic Society, Stevens, Vandervoort and McGall eds., 1980. Paper # 191 Wear Characteristics of Piston Rings and Cylinder Liners Eyre T S, Dent N, Dale P, ASLE Lubrication Engineering, 4(4), 1981, 216-221. Paper # 192 Wear Mechanisms Eyre T S, Powder Metallurgy, 24(2), 1981, 57-63. Paper # 193 Wear Diagnosis by Metallurgical Means Eyre T S, ASLE Lubrication Engineering, 7(1), 1981, 603-607. Paper # 194 Oxidative Wear of Aluminium Alloys Eyre T S, Razavizadeh K, Wear 79, 1982, 325-333. Paper # 195 Oxidative Wear of Aluminium Alloys Eyre T S, Razavizadeh K, Wear 87(3), 1983, 261-271. Paper # 196 Wear of a Cobalt and a Nickel Alloy Abdul-Mahdi F S, Eyre T S, ASLE Lubrication Engineering, 40(4), 1984, 218-224. Paper # 198 Wear of Aluminium Alloys Eyre T S, Metals Society World, 3(1), 1984, 11-12. Paper # 199 An Investigation Into The Failure of a Slew Ring Type Bearing Taken From a Single Point Mooring Eyre T S, In Tribology Offshore, ISBN 85298 5231, MEP, 1984, 15-24. Paper # 200 Wear of Digger Teeth Mashloosh K M, Akbasoglu F C, Eyre T S, Tribology in Mineral Extraction, War on Wear, ISBN 085298 5436, Paper C343/84, 1984, 29-34. Paper # 201 A Study Of Some Cylinder Liner Wear Problems Following the Introduction of High Speed Trains On British Rail Eyre T S, Proc. I. Mech. E. Conference, “Combustion Engines, Reduction of Friction and Wear”, ISBN 085298 5592, C74/85, 1985, 139-153. Paper # 202 Wear of Coatings on Aluminium and its Alloys Abdul-Mahdi F S, Eyre T S, First International Conference on Surface Engineering, The Welding Institute, 1985, p16, 203-222. Paper # 203 Abrasive Wear and its Application to Digger Teeth Mashloosh K M, Eyre T S, Tribology International, 18(5), 1986, 259-266. Paper # 204 Friction and Wear of Aluminium and its Alloys Eyre T S, Abdul-Mahdi F S, Aluminium Technology, Institute of Metals, Paper 100, 1986, 485-492. Paper # 205 Friction and Wear of Some Ceramics in an Overhead Finger Follower System Eyre T S, Benson J, S.A.E. Paper 860398, 1986. Paper # 206 Effect of Attack Angle in Abrasive Wear Mashloosh K M, Eyre T S, Metals and Materials, 2(7), 1986, 426-430. Paper # 207 Wear of Ceramics Under Sliding Conditions Arbabi H, Eyre T S, Metals and Materials, 2(10), 1986, 625-630. Paper # 208 Investigation into the Lubricating Effectiveness of Molybdenum Disulphide Dispersion in a Fully Formulated Oil Arbabi H, Eyre T S, Tribology International, 19(2), 1986, 87-91. Paper # 209 Bore Polishing Identification and Simulation Al-Khalidi G F, Eyre T S, Tribology International, 20(1), 1987, 18-24. Paper # 210 Selecting the Optimum Surfacing Technique for Wear Resistance Eyre T S, Proc. 2nd International Conference on Surface Engineering, The Welding Institute, 1987, 43-1 to 43-14. Paper # 211 Wear of Hard Coatings on Aluminium Under Both Dry and Lubricated Conditions Eyre T S, Abdul-Mahdi F S, Proc. 2nd International Conference on Surface Engineering, The Welding Institute, 1987, 2-1 to 2-16. Paper # 212 Influence of Ion Implantation in Extending Tool Life in Polymer Processing Furze D, Eyre T S, Surface Engineering, 4(3), 1988, 227-232. Paper # 213 Development of Tribo-Test Methods Eyre T S, Eurotrib ’89 Congress, Helsinki, June 1989, Vol. 5, 142-149. Paper # 214 The Testing of Materials in Tribology Eyre T S, Davis F A, Surface Stability, Institute of Metals, 1989, 186-240. Paper # 215 Characterisation and Simulation of Wear Occurring in the Cylinder Bore of the Internal Combustion Engine Eyre T S, Dutta K K,, Davis F A, Proc. I. Mech. E. Conference “Combustion Engines, Reduction of Friction and Wear”, C375/029, ISBN 085298 6955, 1989, 125-132. And reproduced Tribology International, 23(1), 1990, 11-16. Paper # 216 Friction and Wear Control in Industry Eyre T S, Proceeding Nordtrib ’90, Hirtsals, Denmark, ISBN 87-983538-0-2, 1990, 31-46. Paper # 217 Tribological Characteristics of Engineering Ceramics Eyre T S, 11th RISO International Symposium, Roskilde, Denmark, 13-26. Paper # 218 The Effect of a Friction Modifier on Piston Ring and Cylinder Bore Friction and Wear Davis F A, Eyre T S, Tribology International, 23(3), 1990, 163-171. Paper # 219 Friction and Wear Control in Industry Eyre T S, Metals and Materials, 7(3), 1991, 143-148. Paper # 221 The Effect of Silicon Content and Morphology on the Wear of Aluminium/Silicon Alloys under Dry and Lubricated Conditions Davis F A, Eyre T S, Tribology International, 27(3), 1994, 171-181. Paper # 222 Adhesive Wear and Rolling Contact Fatigue Performance of P/M Materials made from Mixtures of Low and High Alloy Ferrous Powders Nurthen P D, Brewin P R, Davis T, Whitehead J A, MPIF Conference, “Advances in Powder Metallurgy & Particulate Materials, San Francisco, Vol. 6, 1992, 265-279. Paper # 223 Wear Performance of Compositions made by Low Alloy Iron/High Alloy Powder Mixtures Nurthen P D, Davis T, Wood J V, Cadle T, Landgraf C, MPIF Conference, “P/M Reaching New Heights”, Chicago, Vol. 5, 1991, 135. Paper # 224 A New P/M Stainless Steel with Improved Corrosion and Wear Resistance Saunders J P, Nurthen P D, Trilk N, Woods P, MPIF Conference, 1993. Paper # 225 Diamond Like Carbon Coatings via a Low Temperature Hybrid PACVD Process Tither D, Ahmed W, Ahmed E, Presented at 4th International Symposium on Advanced Materials ISAM-95, Islamabad, Pakistan, 1995. Paper # 231 A Study of the Performance and Properties of Diamond Like Carbon (DLC) Coatings Deposited by Plasma Chemical Vapour Deposition (CVD) for Two-Stroke Engine Components Tither D, Ahmed W, Sarwar M, Penlington R, Proceedings of the 2nd International Conference on Heat-Resistant Materials, Natesan K, Ganesan P. and Lai G. Eds., Gatlinburg, Tennessee, 11-14 September 1995, 457-461. Paper # 235 Palm Oil and Mineral Oil Based Lubricants Their Tribological and Emission Performance Masjuski H H, Maleque M A, Kubo A, Nonaka T, Tribology International, 32(6), 1999, 305-314. Paper # 239 Comparison of Sliding and Abrasive Wear Mechanisms for Cemented Carbides and Ceramics. Almond E A, Lay L A, Gee M G, Proceedings of 2nd International Conference on the Science of Hard Materials, Institute of Physics Conference Series No 75: p919, Adam Hilger, 1986. Paper # 240 Results from a UK Interlaboratory Project on Dry Sliding Wear. Almond E A, Gee M G, Wear 120 (1987)101. Paper # 241 Some Observations of Ceramic-Metal Sliding Wear. Gee M G, British Ceramics Proceedings, 39(1987)141. Paper # 243 Ceramic Wear Testing and Design. Gee M G, Almond E A, Materials Engineering and Design, Eds B F Dyson and D R Hayhurst, Proceedings of the I of M meeting on Materials and Design, May 1988, 1989, Institute of Metals, p.159. Paper # 244 Effects from vibrations in wear testing of ceramics. Gee M G, Almond E A, Mat Sci Technol, 4(1988)655. Paper # 245 Effects of Test Variables in Wear Testing of Ceramics. Gee M G, Almond E A, Mat Sci Technol, 4(1988)877. Paper # 246 Effect of Surface Finish on the Sliding Wear of Alumina. Gee M G, Almond E A, J Mat Sci, 25(1990)296. Paper # 249 The Effects of Surrounding Atmosphere on the Wear of Sintered Alumina. Perez-Unzueta A J, Beynon J H, Gee M G, To be published in Wear. Paper # 250 Results from a UK interlaboratory exercise on the wear of alumina. Gee M G, ASTM STP 1167, Wear Testing of Advanced Materials, pp. 129-150. Paper # 251 Effect of Test Machine Dynamics on the Sliding Wear of Alumina, Wear Testing of Advanced Materials. Gee M G, ASTM STP 1167, pp.24-44. Paper # 252 Modification to the Surface Layers of Alumina in Sliding Wear. Gee M G, British Ceramic Proceedings, 48(1991)11-25. Paper # 253 The Formation of Glass in the Wear of Reaction Bonded Silicon Nitride. Gee M G, J Appl Phys D, 1A(1992)A182-A188. Paper # 254 The Application of Confocal Scanning Microscopy to the Examination of Ceramic Wear Surfaces. Gee M G, McCormick N J, J Appl Phys D, 1A(1992)A230-235. Paper # 255 The Formation of Aluminium Hydroxide in the Sliding Wear of Alumina. Gee M G, Wear 153(1992)201-227. Paper # 256 Sliding Wear of Alumina. Gee M G, J Hard Materials, 3(1992)363-377. Paper # 258 Wear Metrology: The Art of Determining a Material’s Performance. Gee M G, Materials World, May 1993. Paper # 260 Wear Testing and Ceramics. Gee M G, Proc Instn Mech Engrs, 208(1994)153-166. Paper # 267 Measurement of Friction Under Simulated Metal Working Conditions in Miniaturised Test Systems. Gee M G, Loveday M S, Brookes M R, 1997 Paper # 303 Combined effect of speed and humidity on the wear of silicon nitride. Gee M G, Butterfield D, NPL Report DMM (A)36, September 1991. Paper # 304 Guidelines for Unlubricated Sliding Wear Tests: Part 1, General Approach. Gee M G, NPL Report DMM(A)96, April 1993. Paper # 305 Guidelines for Unlubricated Sliding Wear Tests: Part 2, Procedures for Pin-on-Disc Testing. Gee M G, NPL Report DMM(A)97, April 1993. Paper # 312 Development and Validation of Test Methods for Thin Hard Coatings (FASTE). Vetters H, Meneve J, Jennett N M, Gee M G, von Stebut J, Kelly P, SMT Contract MAT1-CT 9400045, April 1998. Paper # 350 Laboratory Test Rig Simulation of Bore Polish Gondal A K, Davis F A, Eyre T S, Materials Science and Technology January 1998 Vol 14 Paper # 375 Mapping Sliding Wear of Steel in Aqueous Conditions Stack M M, Chi K, Wear 255 (2003) 456 – 465 Paper # 382 Sliding Wear Behaviour of Electrodeposited Cobalt-tungsten and Cobalt-tungsten-iron Alloys Capel H, Shipway P H, Harris S J, Wear 255 (2003) 917 – 923 Paper # 852 The effects of cryogenic processing on the wear resistance of grey cast iron brake discs R Thornton, T Slatter, AH Jones Wear Volume 271, Issues 9-10, 29 July 2011, Pages 2386-2395 Paper # 905 The Real Measurement of Wear using Ultrasonic Reflectometry H Brunskill, P Harper and R Lewis World Tribology Congress 2013 Torino, Italy, September 8 – 13, 2013 Paper # 1187 Enhancement of Wear and Corrosion Resistance of Beta Titanium Alloy by Laser Surface Treatment CW Chan, S Lee, G Smith, G Sarri, CH Ng, A Sharba Applied Surface Science 2016 Paper # 1246 Enhancement of Wear and Corrosion Resistance of Beta Titanium Alloy by Laser Technology Chi-Wai Chan, Seunghwan Lee, Graham Smith, Gianluca Sarri, Chi-Ho Ng, Ahmed Sharba, Hau-Chung Man Applied Surface Science, 367, 30 March 2016 Paper # 1343 Investigating the functionalisation of poly-ether-ether-ketone surfaces through the application of surface texturing for friction and wear control within all polymeric joint … CW Harris 2019 – etheses.bham.ac.uk User List
Launched 1987
Wollongong University, Materials Engineering Department Australia Oronite, Chevron Chemical SA France Hong Kong Polytechnic University Hong Kong University of Trento, Dipartimento di Ingeneria dei Material Italy Berco SPA Italy Samsung Electro-Mechanic Research Centre Korea Chum Chon Industrial Master’s College Korea University of Malaya Malaysia Senter for Industriforskning Norway NTU, Institute of Manufacturing Technology Singapore Sasoil PTY Ltd South Africa Setenasas University Spain Inasmet, San Sebastian Spain Daros Piston Rings Sweden MRL, Industrial Technology Research Institute Taiwan Aero Engine Controls UK Powdrex Ltd UK Lucas Engineering & Systems Ltd UK Heriot-Watt University, Department of Mechanical and Chemical Engineering UK Fuchs Lubricants, Silkolene Oil UK Esso Research Centre UK Bath University, School of Materials Science UK Northrop Grumman Corporation USA Cleveland State University, Chemical Engineering Department USA Allied Signal Aerospace USA 3M Technology Developments Laboratory USA Download the Machine Leaflet
Copyright © 2017 · Phoenix Tribology Ltd
